Connecting Bitbucket Cloud to LinearB
Connect your Bitbucket Cloud account to LinearB to sync repositories, pull requests, and Git activity.

Use this guide to connect Bitbucket Cloud to LinearB so you can scan repositories and analyze Git activity.
Summary
Choose the correct Bitbucket integration type
- Bitbucket Cloud — Connects to Bitbucket’s hosted cloud platform.
- Bitbucket Server (On-Prem) — Requires a self-hosted setup. Refer to the Bitbucket Server Connection Guide for detailed instructions.
What this guide covers
- Connecting Bitbucket Cloud to LinearB
- Granting access during OAuth authorization
- Adding repositories to LinearB
- Adding multiple Git connections (paid plans only)
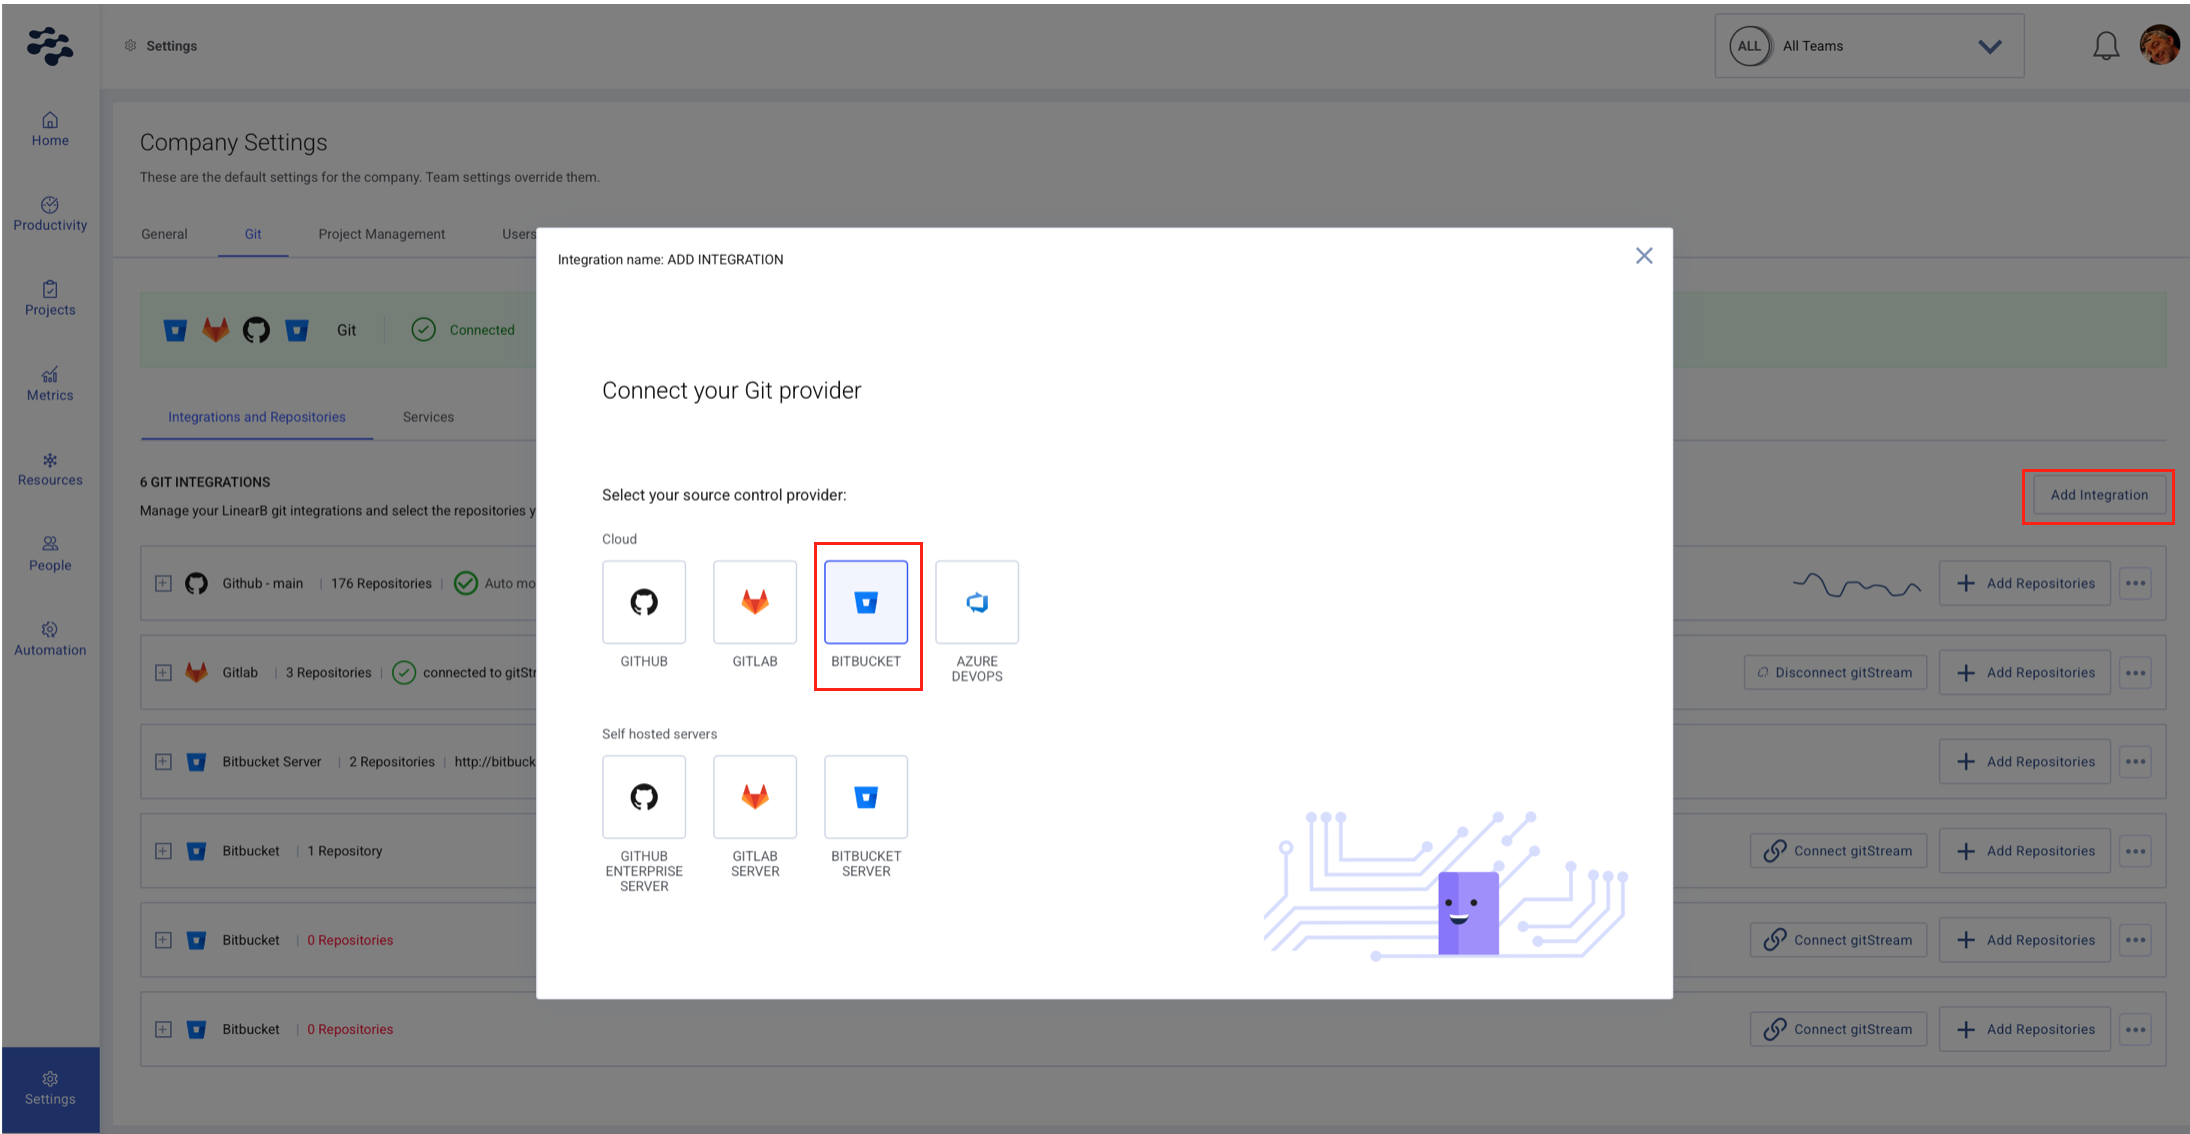
Step 1. Select Bitbucket Cloud as your Git provider
- Go to Settings → Company Settings.
- Select the Git tab.
- Click Add Integration.
- Select Bitbucket Cloud from the list.
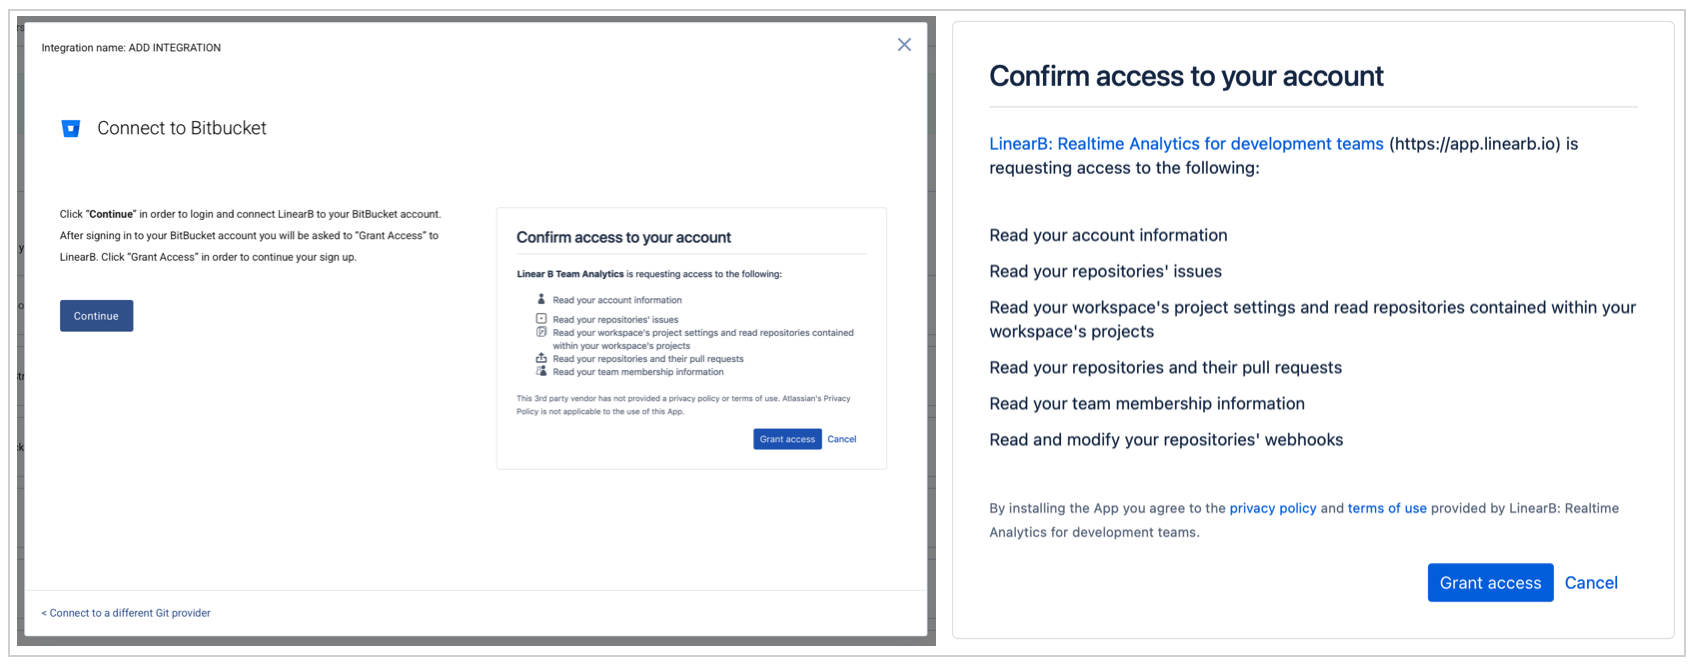
Step 2. Authorize LinearB to access Bitbucket Cloud
- Click Continue to start the connection.
- Log in to your Bitbucket account (if prompted).
- Review the requested permissions.
- Click Grant Access.
You may see a second login prompt. The first creates your LinearB user, and the second connects your Git account.
Step 3. Add multiple Git connections (paid plans only)
If you are on a paid LinearB plan, admins can connect multiple Git providers.
- Go to Account Settings → Git.
- Click Add Connection.
- Follow the prompts to connect additional Git accounts.

Step 4. Add Bitbucket repositories
- Open your Bitbucket integration in LinearB.
- Click Add Repositories.
- Select the repositories you want to connect.
- Click Save Repositories.
Note: Only repositories that are not already linked will appear.

Related guides
Need assistance?
Visit our Support Page.
How did we do?
Bitbucket Server (On-Prem) Connection Guide
GitStream Automation for Bitbucket Cloud