Table of Contents
Bitbucket Server (On-Prem) Connection Guide
Connect LinearB to a self-hosted Bitbucket Server or Data Center to sync repositories and Git activity in on-prem environments.

Use this guide to connect Bitbucket Server (on-prem) to LinearB so you can scan repositories and analyze Git activity.
Summary
What this guide covers
- Selecting Bitbucket Server as your Git provider
- Allowlisting LinearB IPs (for private networks)
- Adding your Bitbucket Server URL
- Creating a Personal Access Token
- Validating the connection and selecting repositories
Before you begin
- LinearB Admin role
- Bitbucket Server account with permission to create a Personal Access Token
- Network access plan (public access or firewall allowlisting)
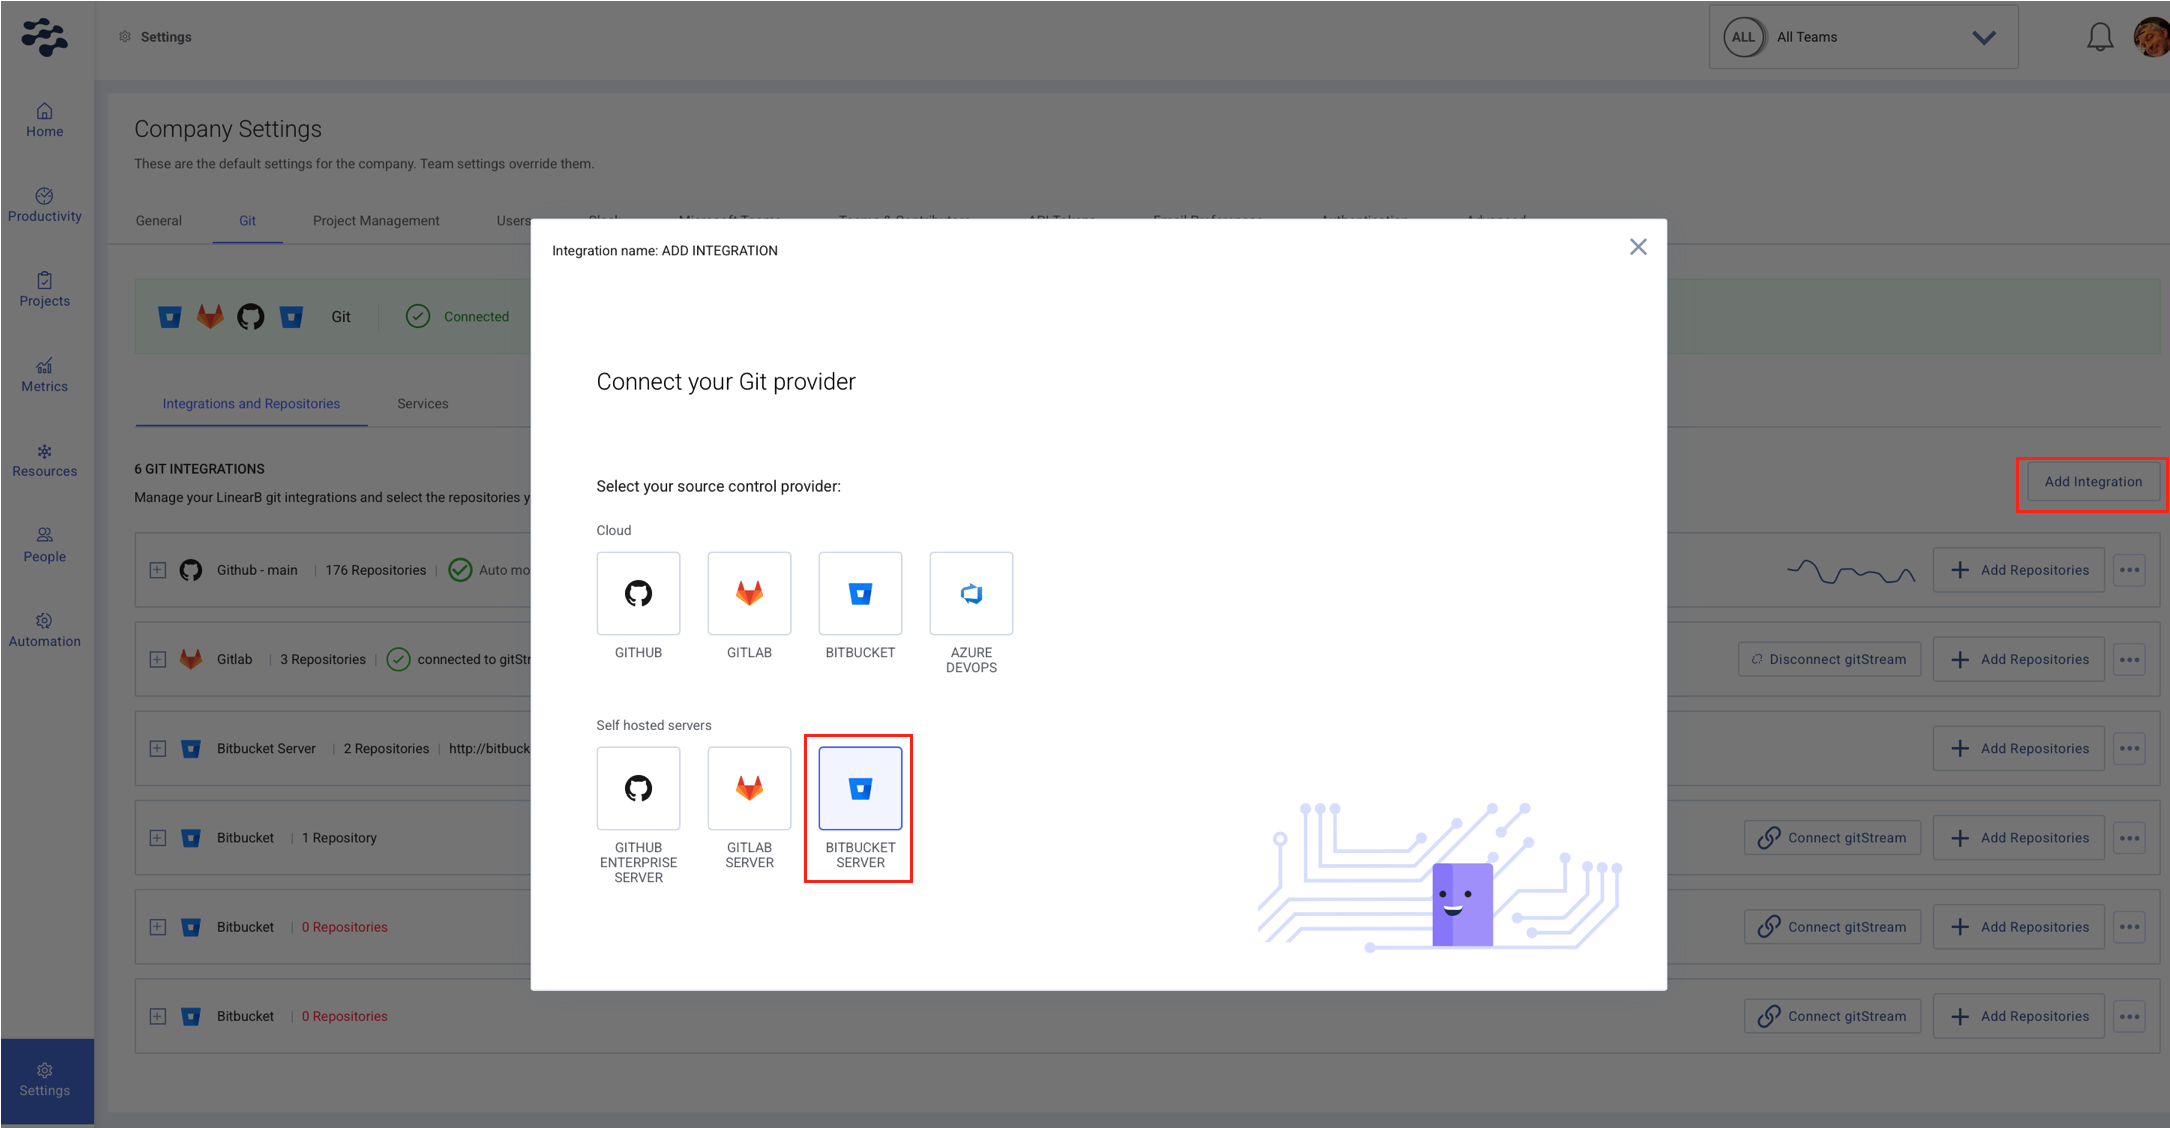
Step 1. Select Bitbucket Server as your Git provider
- In LinearB, go to Settings → Company Settings → Git.
- Click Add Integration.
- Select Bitbucket Server.
Step 2. Allow LinearB access to Bitbucket Server
If your Bitbucket Server instance is accessible from the public internet, you can skip this step.
If your Bitbucket Server is hosted in a private network, allowlist the following LinearB public IP addresses:
52.15.80.8513.56.203.23554.151.81.9818.118.232.229
If your Bitbucket Server is behind a VPN, ensure a reverse proxy allows LinearB access to the required endpoints.
Step 3. Add your Bitbucket Server URL
- Enter your Bitbucket Server URL.
- Wait for LinearB to verify connectivity.
- Click Continue.
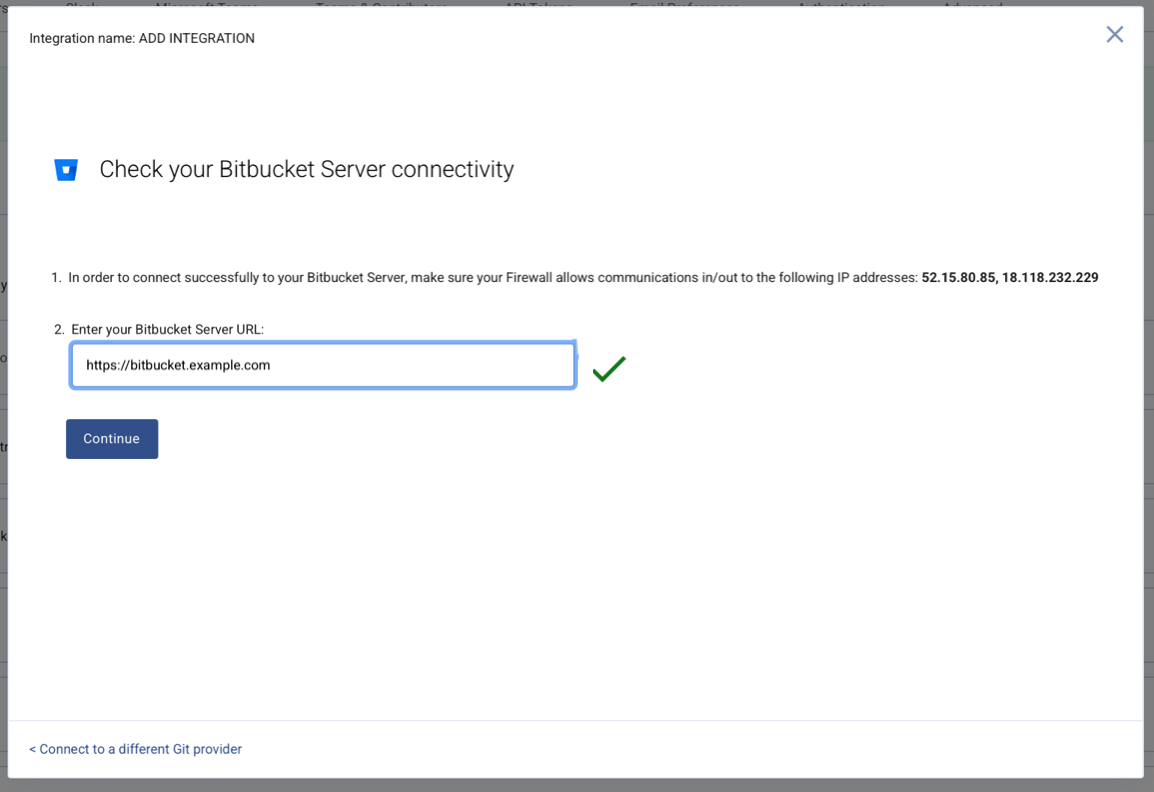
Tip: Use the base URL of your Bitbucket Server instance (for example, https://bitbucket.company.com).
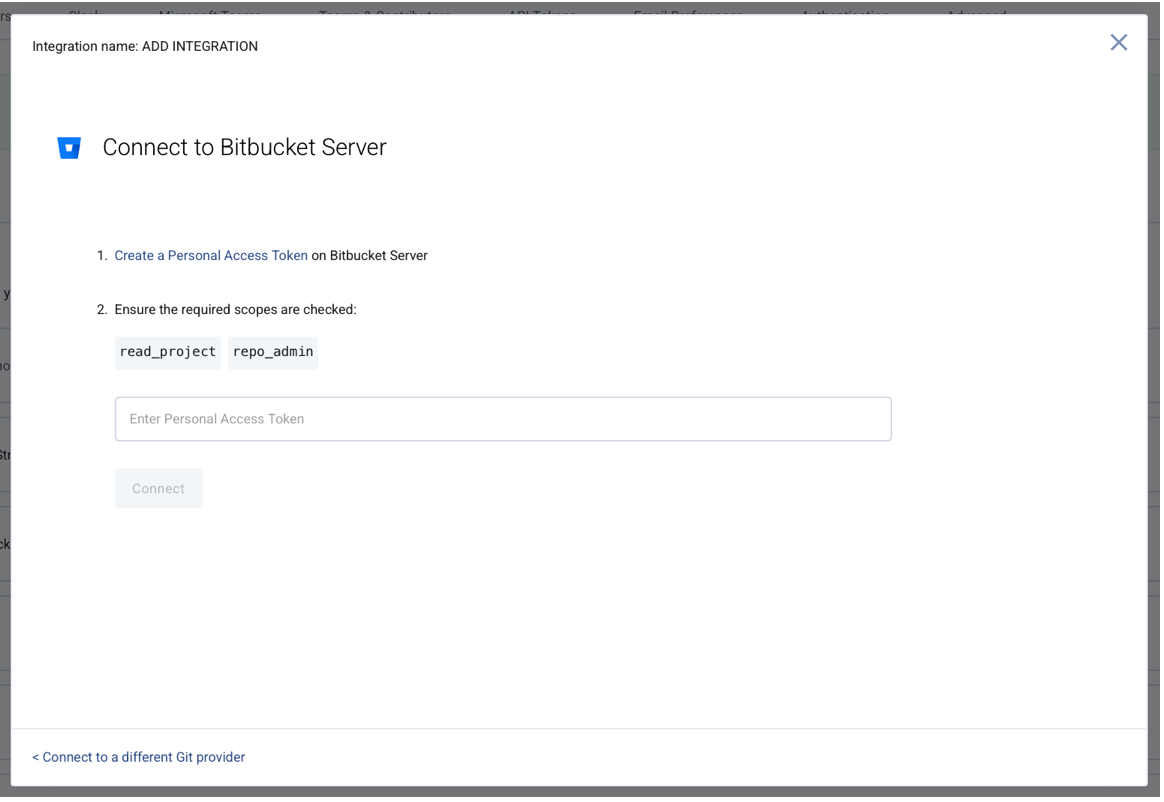
Step 4. Create a Personal Access Token in Bitbucket
- Log in to Bitbucket Server.
- Go to Manage Account → Account Settings → Personal Access Tokens.
- Click Create Token.
- Give the token a name and select Read permissions.
- Copy the token and store it securely.
Step 5. Validate and connect
- Paste the Personal Access Token into LinearB.
- Wait for LinearB to validate the token.
- Select the repositories you want to include.
- Complete the setup.
Troubleshooting
Common issues
- Connectivity check fails
Confirm the Bitbucket Server URL is reachable. If private, allowlist LinearB IPs. If behind VPN, ensure proxy access. - Token validation fails
Ensure the token has Read permissions and was copied correctly. - No repositories appear
Verify the Bitbucket user has access to the expected projects and repositories.
Still stuck? contact support
FAQs
Do I need to expose Bitbucket Server to the internet?
No. You can keep it private and allowlist LinearB IPs or use a reverse proxy.
What permissions are required for the token?
Read access to the repositories you want LinearB to scan.
Need assistance?
Please contact support
How did we do?
Connecting Bitbucket Cloud to LinearB