Table of Contents
GitLab Server (On-Prem) Connection Guide
Connect LinearB to a self-hosted GitLab Server to securely sync repositories and Git activity in on-prem environments.

Use this guide to connect GitLab Server (On-Prem) to LinearB.
Summary
What this guide covers
- Selecting GitLab Server as your Git provider in LinearB
- Allowlisting LinearB IPs (private network only)
- Entering your GitLab Server URL and validating connectivity
- Creating a GitLab Personal Access Token (PAT) with required scopes
- Validating the token and selecting repositories
- Troubleshooting missing repositories
Before you begin
- GitLab: The integration user must be a direct member of the root group (Maintainer or Owner) or a member of each project you want LinearB to access. LinearB only lists projects the integration user is a member of.
- LinearB: Admin role
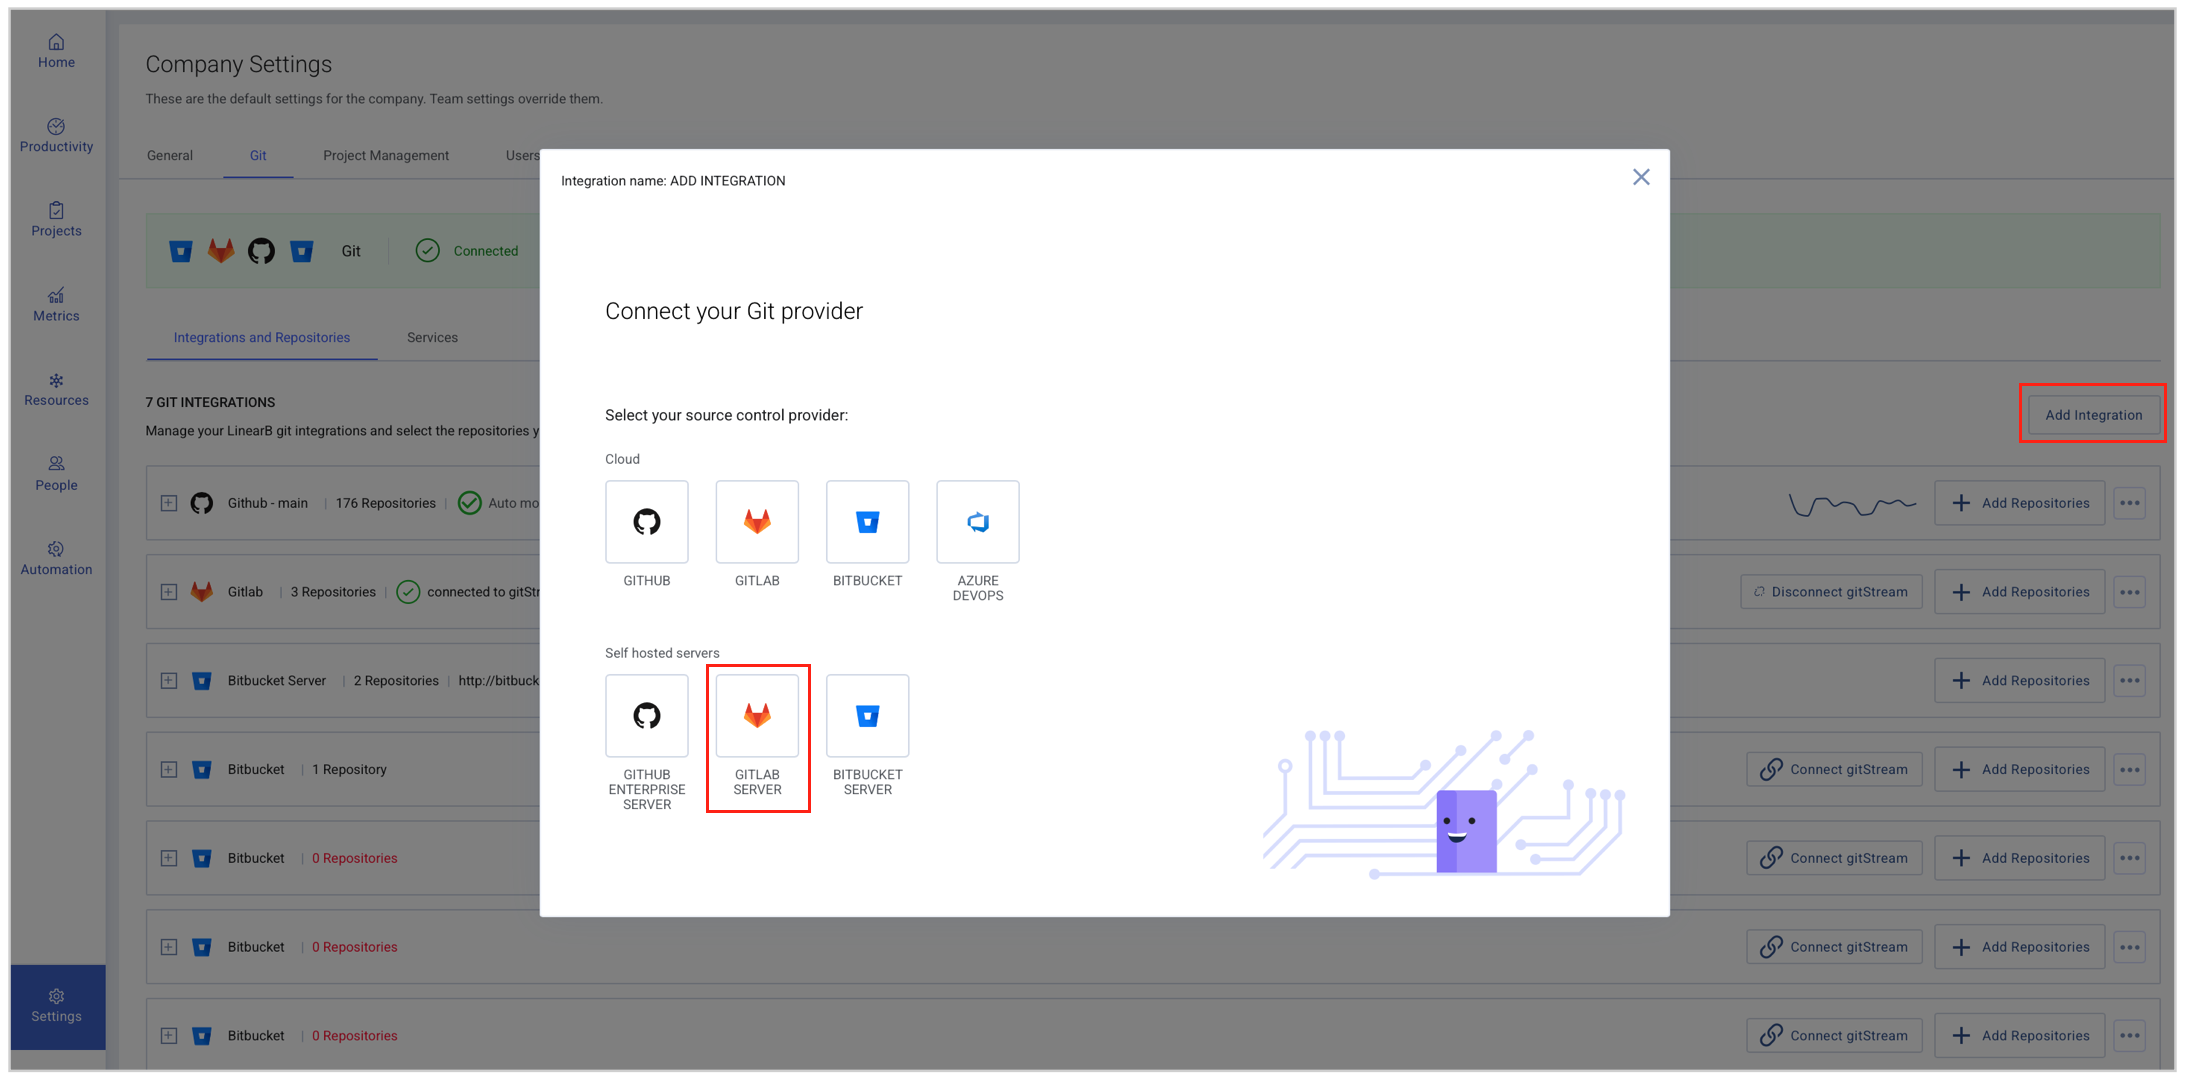
Step 1. Select GitLab Server as your Git provider
- In LinearB, go to Settings → Company Settings and select the Git tab.
- Click Add Integration.
- Select GitLab Server.
Step 2. Allow LinearB access (private networks only)
If your GitLab Server is accessible from the public internet, you can skip this step.
If GitLab Server is hosted on a private network, allowlist the following LinearB public IP addresses in your firewall:
- 52.15.80.85
- 54.241.87.26
- 54.193.121.186
- 18.118.232.229
If your network is behind a VPN, make sure a reverse proxy allows LinearB-specific access to GitLab Server.
Understanding IP allowlisting for gitStream
IP allowlists control which external IPs can access your repositories and APIs. This matters for the LinearB/gitStream integration and for CI/CD runners.
Scenario 1: Webhook handling by gitStream
When GitLab sends a webhook (for example, when a merge request is opened), gitStream may make follow-up API calls (retrieve metadata, post comments, update statuses). These calls originate from LinearB’s IPs listed above, so they must be allowlisted to avoid connectivity issues.
Scenario 2: Outbound requests from CI/CD runners
If gitStream runs in your pipeline, the runner may also make outbound calls (clone repo, retrieve commit history). If runners use dynamic infrastructure, their IPs can change and get blocked unless allowlisted.
Recommended approach
- Allowlist LinearB’s static IPs (above).
- Use self-hosted runners with fixed IPs so they can be allowlisted explicitly.
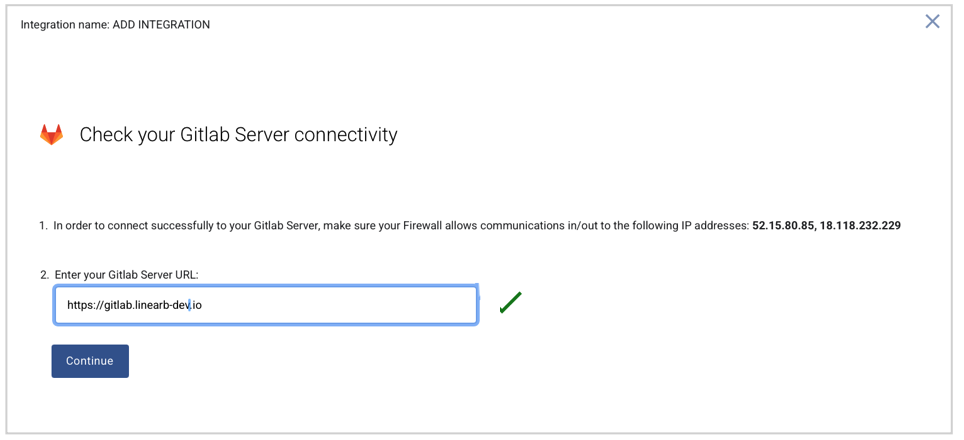
Step 3. Enter your GitLab Server URL
- Enter your GitLab Server URL.
- LinearB checks connectivity automatically.
- When verified, click Continue.
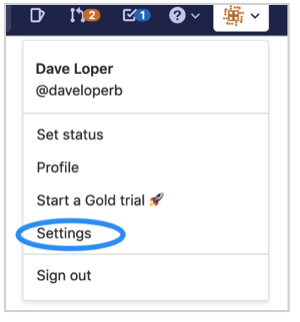
Step 4. Create a GitLab Personal Access Token (PAT)
- In GitLab Server, select your avatar (top-right).
- Select Settings.
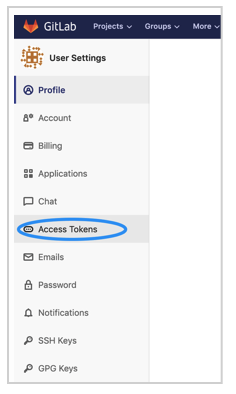
- Under User Settings, select Access Tokens.
- Enter a name for the token and (optionally) set an expiry date.
-
Select the following scopes:
read_userapiread_repositorywrite_repository
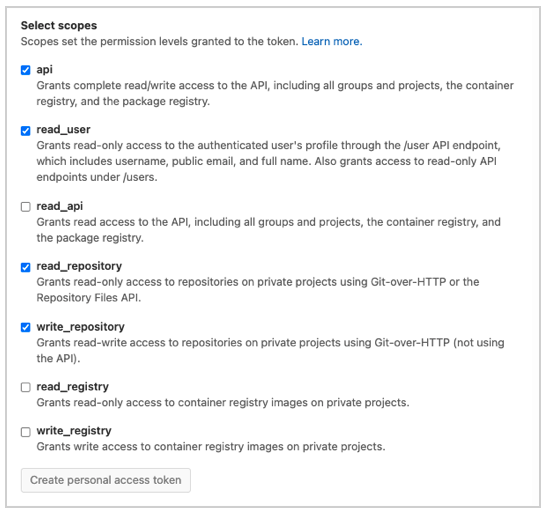
- Click Create Personal Access Token.

- Copy the token immediately (you won’t be able to view it again).
- Store the token securely for future use.
Step 5. Validate and connect
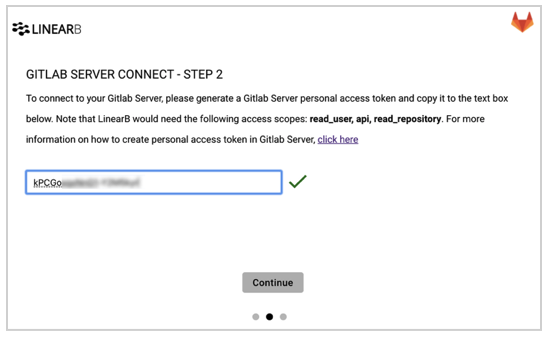
- Paste the personal access token into the LinearB setup screen.
- LinearB validates the token automatically.
- After validation, continue to repository selection and choose which repositories to sync.
Troubleshooting
- If a repository does not appear in LinearB, verify the integration user is added to the relevant GitLab group or project. LinearB only lists projects the integration user is a member of.
Related guides
Need assistance?
Visit our Support Page.
How did we do?
Connecting GitLab to LinearB