Table of Contents
Using Project Filters in LinearB
Learn how to use, manage, and optimize project filters in LinearB to track progress, allocate resources, and enhance team collaboration.

Overview
Project filters in LinearB allow teams to track, measure, and analyze progress within a defined scope of work. By applying project filters, users can:
• Monitor project progress over time.
• Analyze business and operational aspects.
• Gain deeper insights for planning and decision-making.
Project filters are available in key LinearB modules, including Forecasting, Resource Allocation, and Investment Strategy.
Types of Project Filters
LinearB provides two types of project filters:
- Project Filters – Used for well-defined projects with a specific business scope and delivery deadline.
- Filter Sets – Used to track a group of activities that may not have a fixed end date, ideal for ongoing monitoring.

Filter Visibility and Permissions
Filters can be set as either:
- Private – Only the creator can view and edit the filter.
- Public – Any user with access to the relevant module can view the filter, but only the creator can edit it.
Only the filter creator or a platform administrator can edit or delete filters.
Using the Project Filter Menu
The Project Filter menu features in the Forecasting, Resource Allocation, and Investment Strategy modules. It is located in the upper-right corner of the screen next to Apply Filters.
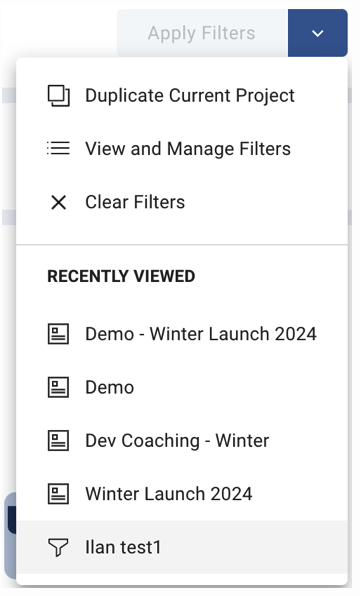
Project Filter Definition Area
This area displays the current filter settings inside a rectangular gray border and provides options to manage filters.

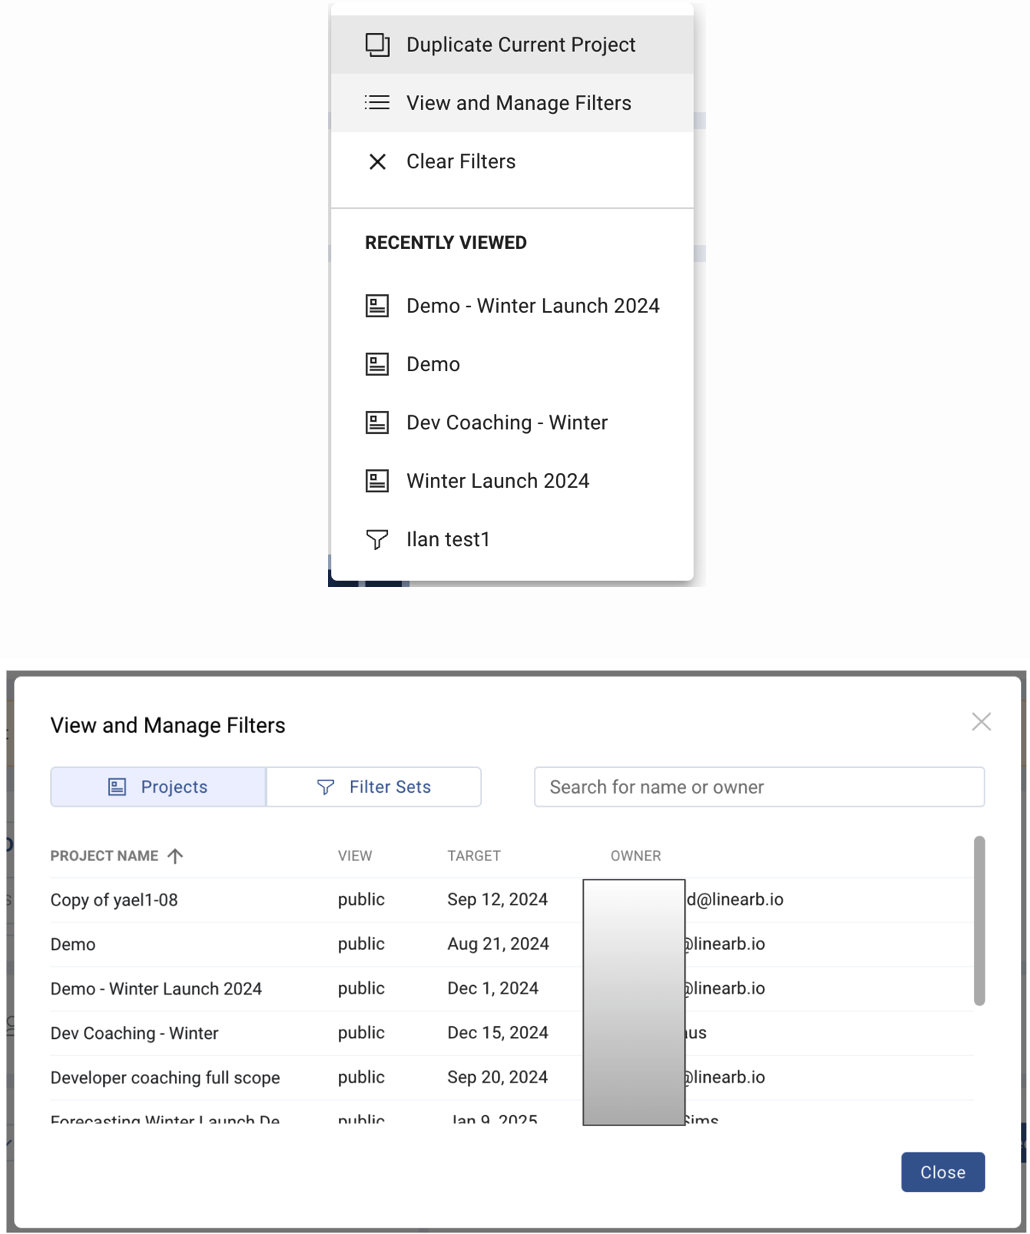
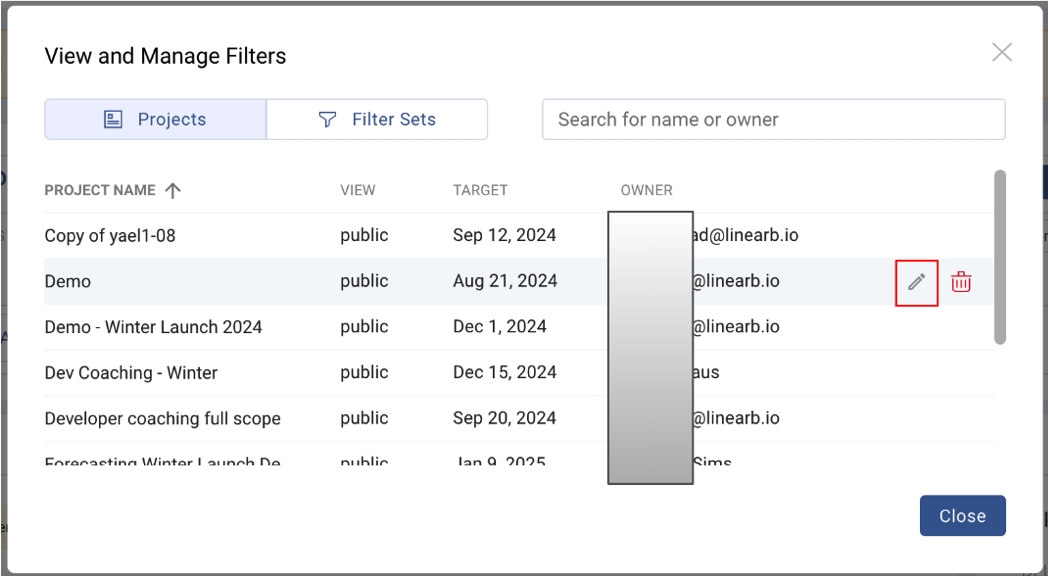
View and Manage the Filters Modal
Accessible via the Project Filter menu, this section allows you to:
- View all filters you have access to.
- Manage and edit filters you own.
The modal contains two tabs:
- Projects – Displays saved project-based filters.
- Filter Sets – Displays saved sets of grouped activities.
Each filter entry includes:
- Project Name: The name of the saved project filter.
- View: The filter visibility status (Public or Private).
- Target (Projects tab only): The target date for delivering the project.
- Owner: The creator and owner of the project filter.
Note: Clicking a filter opens it in the respective module.
Permissions
When you hover over a project filter row, if you have the necessary permissions, the Delete and Edit icons appear.
If no icons are visible, you can view the filter but you do not have edit permissions.

Creating and Managing Project Filters
Creating a New Project Filter
- Open the Project Filter menu, and select Save Filter.
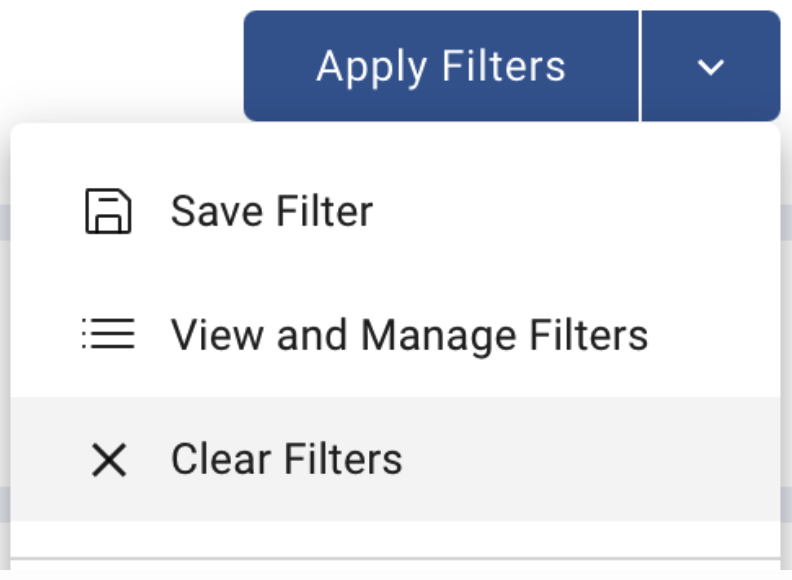
- Enter a display name.
- Choose the filter type (Filter Set or Project).
- Define the visibility settings (Private or Public).
- Click Save.
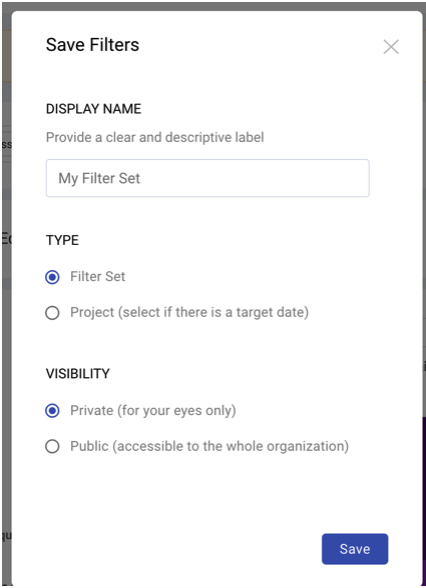
The new project filter is saved and available under the View and Manage Filters option in the menu.
Important: Saved project filters do not include a timeframe—they inherit the timeframe from the selected module when applied.
Editing a Project Filter
- Click the Project Filter menu.
- Double-click on a project filter name to open it.
- Click the arrow next to the project filter name to view the defined filters.

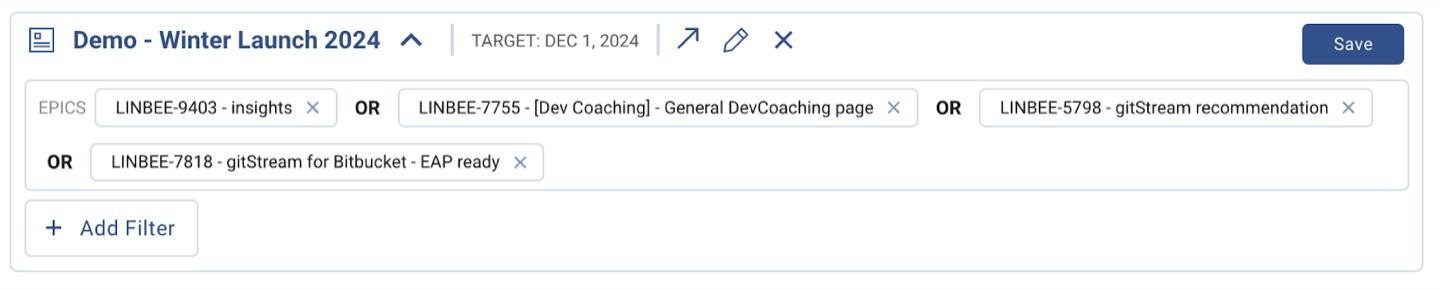
- Modify any filter settings as needed.
- Click Save, located in the upper-right corner of the Project Filter Definition section.

Note: If the Save option is missing after making changes, it means you do not have edit permissions for this project filter. To make modifications, use the Duplicate Current Project option to create a copy, which you can then edit and save.
Editing Project Filter Properties
You can modify a project filter’s name, visibility, and other properties using one of the following methods:
1. Using the Filter Definition Area
- Open the Project Filter.
- Click the Edit icon within the Filter Definition Area.

2. Using the View and Manage Filters Modal
- Open the Project Filter menu and select View and Manage Filters.
- Hover over the filter and click the Edit icon.
Note: If the Edit icon is missing, you do not have edit permissions. Use Duplicate Current Project to create a copy that you can modify.
Duplicating a Project Filter
Use the Duplicate Current Project option to create a new filter based on an existing one.
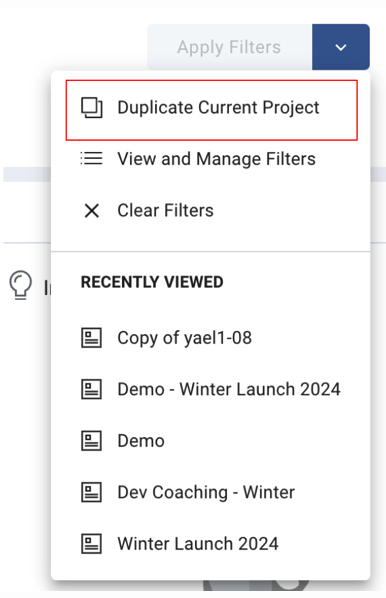
- Available under the Project Filter menu.
- Creates a new project filter based on the selected one, which you can then edit and save.

Deleting a Filter
- Open View and Manage Filters.
- Open the Project Filter menu.
- Hover over the filter and click the red Trash icon.
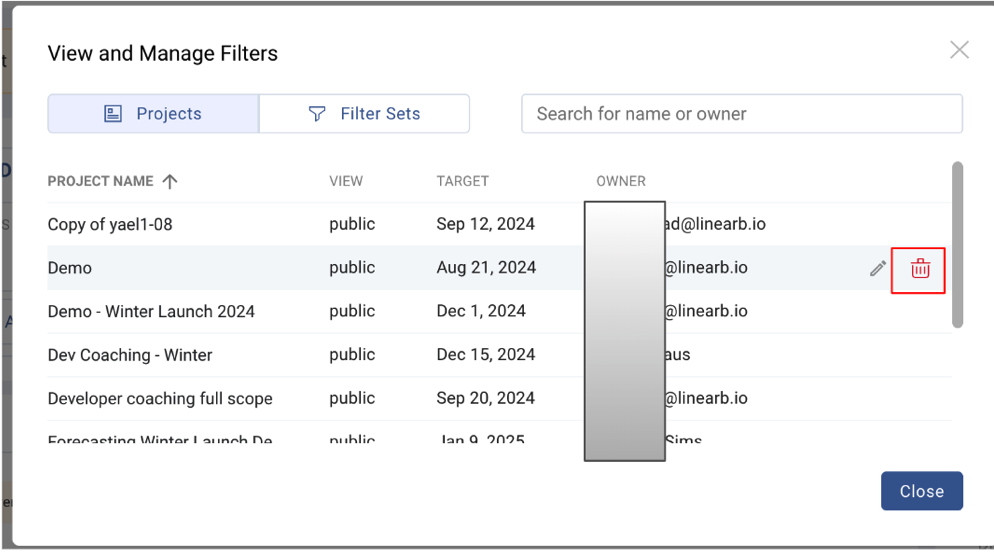
Note: If the delete option is unavailable, you do not have the necessary permissions. Project filters can only be deleted and edited by the filter creator or a platform administrator.
Applying Filters Across Modules
Project filters can be used in:
• Forecasting – Analyze projected outcomes.
• Resource Allocation – Evaluate resource distribution.
• Investment Strategy – Assess investment distribution.
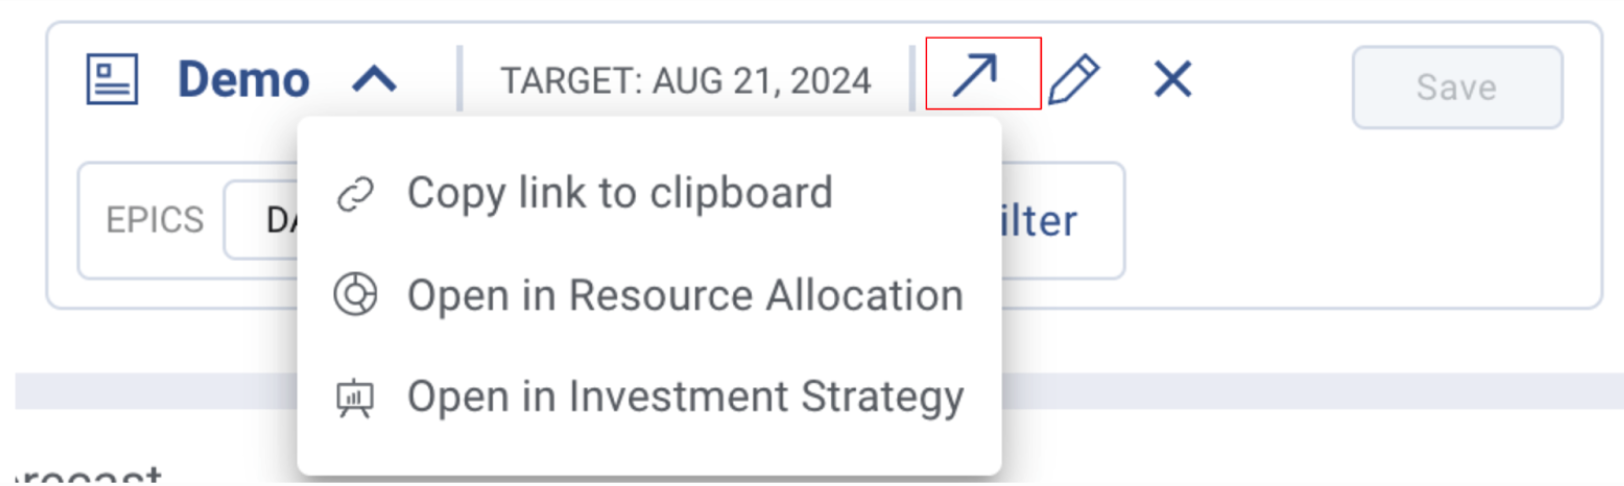
To switch between modules:
- Open a Project Filter.
- Click the Module Navigation Arrow in the Project Filter Definition Area.
- Select the required module. The selected module opens with the active filters applied.

Sharing Project Filters
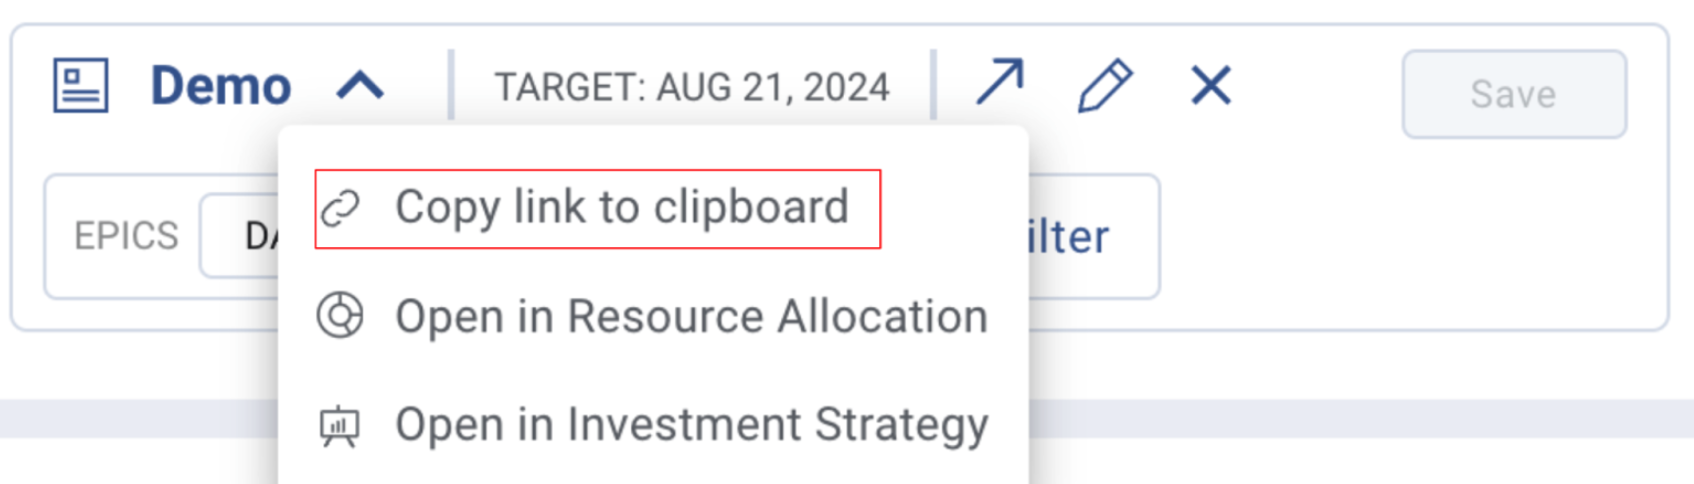
Filters can be shared via a direct link:
- Open the Project Filter.
- Copy the URL from the address bar.
- Share the link with teammates.
Note: Recipients must have the necessary permissions to access the linked module.

Best Practices for Using Project Filters
- Check Your Permissions – Ensure you have the right access before editing or deleting a filter. If you lack permissions, use Duplicate Current Project to create an editable copy.
- Use Clear Naming Conventions – Choose descriptive, intuitive names for your filters to make them easy to identify and use.
- Keep Filters Up to Date – Regularly update filters to reflect changes in project scope, priorities, or team needs.
- Enable Team Collaboration – Set filters to public when relevant to ensure alignment across teams and provide a shared view of project progress.
By leveraging saved filters effectively, you can streamline project tracking, enhance visibility, and make more data-driven decisions within your organization.
How did we do?
Resource Allocation