Table of Contents
Configuring SAML SSO with LinearB
Enterprise customers can enable SAML Single Sign-On (SSO) to streamline user authentication with LinearB.

This integration works with any SAML 2.0-compliant Identity Provider (IDP), including Okta, OneLogin, Azure AD, and Google Workspace (GSuite).
Below is a complete guide to configuring, enabling, and managing SAML SSO in LinearB, combined with the Authentication tab settings.

Key Concepts
IDP: Identity Provider (e.g., Okta, OneLogin, Azure AD).
SP: Service Provider (LinearB in this case).

Step 1: Enable SAML SSO in LinearB
- In the LinearB side menu, click Settings.
- Navigate to Company Settings > Authentication.
- Click the Single Sign-On tab.
- Click Set Up SSO to begin.

Step 2: Configure SAML in Your Identity Provider
Mapping userName in Okta
The userName attribute mapping in Okta allows the Okta administrator to define which field LinearB will use as the username for new users created through SAML SSO. In most cases, this field is user.login (e.g., ${user.login}). If the userName attribute is not mapped, LinearB will default to using the user's email as their username.
- Go to the LinearB application in Okta.
- Click on the General tab.
- Under SAML Settings, click Edit.
- Click Next.
- Under Attribute Statements, create a field named
userNameand set its value to${user.login}. - Click Next, then Finish to save your changes.

Your IDP admin must configure a SAML 2.0 integration in your company’s Identity Provider. You will need the following details from LinearB:
Field | Value |
Callback URL/ACS URL | Dynamically generated within LinearB after setup. |
Audience URL/Entity ID |
|
Name ID Format | Set to email. |
Attributes Required | None (only the Name ID is required). |
Logo | LinearB logo available for download here. |

Step 3. Integrate SSO With LinearB
- In LinearB's Single Sign-On tab, fill in the following fields with information from your IDP:
- Provider Single Sign-On URL: Sometimes labeled as "SSO URL" in your IDP.
- Provider Issuer: The Issuer URL or Entity ID for the IDP.
- Organization Email Domain: The domain used by your team’s email addresses (e.g.,
example.com). - Certificate: Paste the full x509 certificate provided by your IDP.
- Click Save to test the SSO connection.

Step 4: Test SSO Connection
- After saving your settings, LinearB will trigger a test login flow.
- If successful, the SAML Authentication toggle will automatically be set to ON.

Step 5: Enforce SSO for All Users
To enforce SSO login across your organization:
- Click Edit in the Single Sign-On tab.
- Check the box for "Team members will only be able to access LinearB using your SSO provider".
- Click Save.
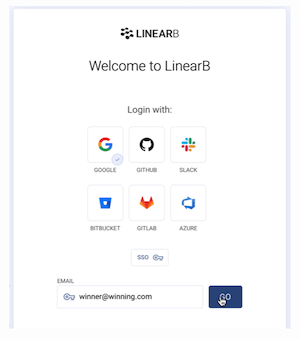
When enabled, the Welcome to Linear B pop-up opens, and users will be required to log in using their email addresses linked to the SSO provider.
If this option is unchecked, users can log in using either SSO or other available authentication methods.

User Management with SSO Enabled
Inviting Users
- New users must be added via your IDP’s LinearB integration.
- Just-In-Time (JIT) Provisioning: Once a user is provisioned in your IDP, they can log in to LinearB, and their account will be automatically created.
- By default, newly added users will have Viewer permissions. LinearB Admins can update their permissions from the User Settings page.

SSO Configuration Fields (Reference)
Field | Description |
Single Sign-On Status | Indicates whether SSO is enabled and connected. |
Callback URL | Endpoint provided by LinearB to link with your IDP. |
Provider Single Sign-On URL | The login URL from your IDP. |
Provider Issuer | Issuer URL or Entity ID provided by the IDP. |
Organization Email Domain | Your team’s email domain ( |
Certificate | Paste the full x509 certificate from your IDP. |
Team Access Restriction | Restricts access to LinearB via the configured SSO provider only. |
Default Team Access | - All teams are accessible at first login. |
Copy code: - No access until manually assigned by an Admin.

Disabling SSO
To disable SSO:
- Navigate to Company Settings > Authentication > Single Sign-On.
- Slide the SAML Authentication toggle to the OFF position.
- When prompted, click Disable SSO.

Additional Vendor-Specific SSO Articles
For vendor-specific instructions, refer to:
How did we do?